Essential Pallet Racking Inspection Procedures: Complete Safety Protocol for Warehouse Managers
Warehouse accidents involving pallet racking failures cost companies thousands in downtime, inventory damage, and potential injuries. A systematic inspection protocol catches structural issues before they become catastrophic problems, keeping your operation running safely and efficiently.
Required Equipment for Professional Racking Inspections
Pallet Racking Inspection Procedures Overview
Standard Inspection Template
Every facility needs a standardized checklist that outlines specific damage thresholds and measurement requirements. The Maafe safety team provides comprehensive templates that eliminate guesswork from the inspection process. These templates list exact measurements for each racking component, ensuring consistency across different inspection teams and shifts.
Without a proper template, inspectors often miss critical damage or apply inconsistent standards. The template serves as both a training tool for new staff and a documentation system for compliance records.
Feeler Gauge Selection and Setup
Professional racking inspections require precision measurement tools. Feeler gauges are available at Princess Auto or any quality hardware store. The complete gauge set measures up to 10mm depth, covering all standard damage thresholds.
Color-coding your gauges with permanent markers creates a quick reference system. Mark your 3mm gauge in one color, 5mm in another, and leave the 10mm natural. This simple modification speeds up inspections and reduces measurement errors during busy periods.
Proper Straight Edge Tools
The straight edge must match your specific racking configuration. Standard beam setups might work with shorter tools, but deeper beam configurations require 27-inch or 2-foot straight edges to achieve flush contact against the racking surface.
Test your straight edge against different beam types in your facility. If the tool doesn’t sit flush against the racking, your measurements will be inaccurate, potentially missing dangerous damage or creating false positives that waste time on unnecessary repairs.
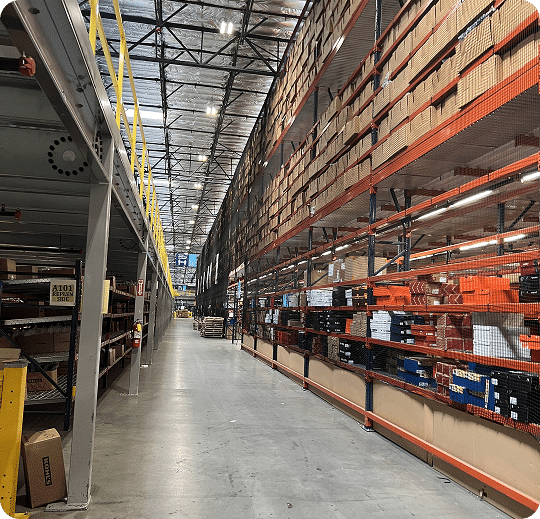
Shelving Compliance and Safety Standards
Fire Safety Requirements for Forklift Operations
Forklift racking installations must use wire shelving only. Solid shelves create a fire hazard by preventing sprinkler water from reaching lower levels during emergencies. This isn’t just a best practice—it’s a critical safety requirement that could save lives and prevent total facility loss during a fire event.
Wire shelving allows water penetration through all rack levels, ensuring your sprinkler system can effectively suppress fires throughout the vertical storage space. Check every shelf level during inspections to verify compliance.
Shelving Integrity Assessment
Beyond material compliance, assess each shelf for structural damage, proper installation, and appropriate load distribution. Look for bent wires, missing supports, or overloaded sections that could compromise the entire racking system.
Document any shelving issues alongside structural racking problems. Damaged shelving often indicates overloading or impact damage that might affect the supporting racking structure as well.
Floor-Level Protection Systems
Bollard Inspection Protocol
Bollards protect your racking uprights from forklift impact damage. During each inspection, verify that bollards are properly positioned, structurally intact, and haven’t sustained damage that reduces their protective capability.
Missing or damaged bollards leave your racking vulnerable to impact damage that can compromise structural integrity. Replace damaged bollards immediately rather than waiting for scheduled maintenance periods.
Check bollard anchoring systems as well. Loose bollards provide minimal protection and might actually create additional hazards during impact events.
Critical Damage Measurement Standards
Understanding Damage Thresholds
Different racking components have specific damage limits before they require replacement or repair. These thresholds are based on engineering calculations that account for load distribution and structural integrity requirements.
Upright frame columns can tolerate less than 5mm of damage before requiring attention. Front upright columns have a stricter 3mm threshold due to their critical load-bearing role. Diagonal and horizontal braces allow up to 10mm of damage before replacement becomes necessary.
These measurements aren’t arbitrary—they’re calculated based on how much structural capacity each component can lose while maintaining safe operation under maximum rated loads.
Proper Measurement Techniques
Position your straight edge flush against the racking surface, ensuring complete contact across the measurement area. Insert the appropriate feeler gauge between the straight edge and the damaged section to measure depth accurately.
The feeler gauge should slide easily into damage that exceeds safe limits. If you have to force the gauge, the damage likely falls within acceptable parameters. However, document all measurements regardless of severity to track progressive damage over time.
Take measurements at the deepest point of any damage. Surface scratches don’t compromise structural integrity, but dents that reduce material thickness can significantly impact load-bearing capacity.
Beam Deflection Analysis
Calculation Method and Standards
Beam deflection limits are calculated using a simple formula: beam length divided by 180 equals maximum allowable deflection in inches. For a 100-inch beam, the maximum allowable deflection is 0.55 inches.
This calculation accounts for the beam’s design load and ensures that deflection doesn’t compromise the racking’s ability to support maximum weight ratings. Excessive deflection can lead to catastrophic failure under full load conditions.
Measurement Process
Measure the height from floor to beam at both the edge and center points. The difference between these measurements represents actual deflection. Compare this difference to your calculated maximum allowable deflection.
In practice, a 100-inch beam measuring 53.5 inches at the edge and 53.25 inches at the center shows 0.25 inches of deflection—well within the 0.55-inch threshold and safe for continued operation.
Document deflection measurements even when they fall within acceptable limits. Progressive deflection over time might indicate developing structural issues that require monitoring.
Repair vs. Replacement Decision Framework
Engineered Repair Solutions
Not all damage requires complete racking replacement. Engineered repair solutions, such as professionally designed reinforcement plates, can restore structural integrity while maintaining original load capacities.
These repairs must be designed by qualified engineers who can calculate load distributions and ensure the repair maintains safety standards. Generic repair attempts without proper engineering analysis can create more dangerous conditions than the original damage.
Engineered repairs often provide cost-effective alternatives to complete section replacement, reducing downtime and material costs while maintaining safety standards.
When Replacement Becomes Necessary
Replace racking components immediately when damage exceeds established thresholds. Continuing to use damaged racking beyond safe limits puts your entire operation at risk of catastrophic failure.
Consider replacement costs against potential losses from racking failure, including inventory damage, equipment repairs, worker injury claims, and operational downtime. Replacement almost always costs less than dealing with failure consequences.
Plan replacement activities during low-traffic periods to minimize operational disruption. Having spare components on hand allows for immediate repairs when critical damage is discovered.
Implementation Best Practices
Establishing Inspection Schedules
Regular inspections catch developing problems before they become critical. Establish inspection frequencies based on facility traffic, load weights, and equipment operation patterns. High-traffic areas need more frequent attention than occasional-use storage zones.
Train multiple team members on inspection procedures to ensure continuity during staff changes or busy periods. Cross-training prevents inspection lapses that could allow dangerous conditions to develop unnoticed.
Documentation and Follow-up Procedures
Maintain detailed records of all inspections, including measurements, photos of damage, and repair actions taken. This documentation supports insurance claims, regulatory compliance, and helps identify recurring problem areas.
Establish clear protocols for addressing discovered damage. Define who makes repair/replacement decisions, how quickly action must be taken, and what interim safety measures are required while repairs are pending.
Create a tracking system for progressive damage that doesn’t yet require immediate action. Trending this data helps predict when repairs will become necessary and allows for better maintenance planning.
Frequently Asked Questions
What happens if I find damage that exceeds the safety thresholds during an inspection? Immediately offload the affected racking section and mark it as out of service. Schedule repair or replacement before allowing any loads back on that section. Document the damage and contact qualified engineers for repair assessment if needed.
How often should I conduct formal racking inspections in my facility? Inspection frequency depends on facility traffic and load patterns. High-traffic warehouse areas typically need monthly inspections, while lower-traffic zones might require quarterly checks. Establish a schedule based on your specific operational conditions and stick to it consistently.
Can I use any straight edge tool for measuring racking damage, or do I need specific equipment? The straight edge must be long enough and properly shaped to sit flush against your specific beam configuration. Standard tools work for most setups, but some beam profiles require longer or specially shaped straight edges to get accurate measurements.
What’s the difference between damage that needs immediate attention versus damage I can monitor over time? Any damage exceeding the established thresholds (3mm for front uprights, 5mm for frame columns, 10mm for braces) requires immediate action. Lesser damage should be documented and monitored during subsequent inspections to track progression.
How do I calculate beam deflection limits for different beam lengths in my facility? Divide the beam length by 180 to get maximum allowable deflection in inches. A 96-inch beam allows 0.53 inches of deflection, while a 120-inch beam allows 0.67 inches. Use this formula for any beam length in your facility.
Are engineered repairs as safe as replacing the entire damaged section? Properly engineered repairs designed by qualified professionals can restore full structural integrity and load capacity. However, generic or improvised repairs without proper engineering analysis are dangerous and should never be used.
What documentation do I need to maintain for regulatory compliance? Keep detailed inspection records including dates, inspector names, specific measurements, photos of damage, and all repair actions taken. This documentation supports insurance claims and regulatory inspections while helping identify recurring issues.
How do I train new staff on proper inspection procedures? Use your standardized inspection template as a training guide. Pair new inspectors with experienced staff for several inspection cycles, ensuring they understand measurement techniques and damage assessment criteria before conducting independent inspections.
What should I do if I don’t have the right equipment for proper inspections? Contact safety equipment suppliers or the Maafe safety team to obtain proper inspection templates, feeler gauges, and straight edges. Don’t attempt inspections without appropriate tools—inaccurate measurements can miss dangerous damage or create unnecessary work.
Can I continue using racking with minor damage while waiting for repair parts? Only if the damage falls well within acceptable thresholds and you can monitor it closely. Any damage approaching or exceeding safety limits requires immediate offloading regardless of repair scheduling challenges.
Key Takeaways
- Invest in proper inspection equipment including standardized templates, precision feeler gauges, and appropriate straight edge tools sized for your specific racking configuration
- Learn the critical damage thresholds: 3mm for front uprights, 5mm for frame columns, and 10mm for diagonal braces—exceeding these limits requires immediate offloading and repair
- Calculate beam deflection using the standard formula (beam length ÷ 180) and measure actual deflection by comparing edge and center heights from floor level
- Establish regular inspection schedules based on facility traffic patterns and maintain detailed documentation of all findings, measurements, and corrective actions taken
- Consider engineered repairs for cost-effective solutions that maintain structural integrity while reducing replacement costs and operational downtime
- Train multiple team members on inspection procedures to ensure continuity and consistency across different shifts and personnel changes
- Address safety violations immediately, particularly solid shelving in forklift areas that prevents proper sprinkler system operation during fire emergencies

Ted Hodges - CEO & Founder
Ted Hodges is the Founder and CEO of Conesco Storage Systems, a company he started in 1986 to provide turnkey warehousing products and services, including the repurposing of quality, used material handling equipment. With over 40 employees across the country, Ted and his team serve customers of all sizes throughout the different stages of the warehousing lifecycle.