How to Plan Your Warehouse Pallet Rack Layout: A Complete Guide to Maximizing Space and Efficiency
Warehouse pallet rack layout planning determines whether your facility operates as a productivity powerhouse or a bottleneck-riddled struggle. Smart layout decisions can increase storage capacity by 25-40% while cutting picking times and improving safety. Poor planning creates operational headaches that compound daily and cost thousands in lost efficiency.
The difference lies in systematic planning that addresses space utilization, workflow optimization, and future scalability from the start. This comprehensive approach transforms warehouses into strategic assets that support business growth instead of limiting it.
Foundation: Assessing Your Warehouse Space
Measure Everything That Matters
Start with precise facility measurements including length, width, and ceiling height at multiple points. Warehouses rarely have perfectly uniform dimensions, and small variations can significantly impact rack placement and capacity calculations.
Document column locations with exact measurements from walls and each other. These structural elements will determine rack row positioning and aisle layouts. Note any permanent fixtures, electrical panels, fire suppression equipment, and loading dock configurations that affect usable space.
Ceiling height measurements matter most for vertical space optimization. Measure at various points since floors and ceilings aren’t always level. Factor in required clearances for sprinkler systems, typically 18-36 inches depending on local fire codes.
Code Compliance Drives Design Decisions
Fire suppression clearances, emergency egress requirements, and electrical access needs shape layout possibilities. These aren’t optional considerations that can be addressed later. They’re fundamental constraints that must guide initial design decisions.
OSHA, NFPA, and local building codes establish minimum standards for aisle widths, emergency exits, and fire protection access. Understanding these requirements early prevents costly redesigns and ensures regulatory compliance throughout the planning process.
Emergency exit paths must remain clear and accessible at all times. This requirement affects rack placement near building perimeters and influences aisle width decisions in high-traffic areas.
Inventory Analysis: The Foundation of Smart Layout
SKU Profiling Determines Storage Strategy
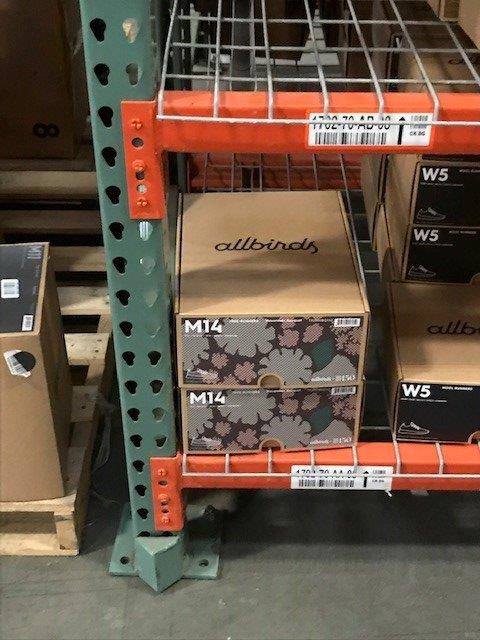
Catalog your complete SKU profile including pallet sizes, weights, and dimensions. Standard pallet sizes enable higher density storage, while mixed sizes require flexible rack configurations that reduce overall capacity.
Turnover rate analysis identifies which products need prime real estate. Fast-moving items belong in easily accessible locations near shipping areas. Slower inventory can occupy deeper storage zones where density matters more than quick access.
Weight distribution affects rack selection and beam spacing. Heavy products require stronger beams with closer spacing, while lighter items can use standard configurations. Understanding weight patterns prevents overbuilding in some areas while ensuring adequate capacity where needed.
Velocity-Based Positioning Strategy
High-velocity items should occupy positions within 50 feet of shipping areas when possible. This proximity reduces travel time for the products that move most frequently, creating the biggest impact on overall picking productivity.
Medium-velocity products work well in intermediate zones that balance accessibility with space efficiency. These items don’t need prime locations but shouldn’t be relegated to the furthest storage areas either.
Slow-moving inventory can use high-density storage in less accessible locations. Since these products move infrequently, maximizing storage capacity takes priority over quick access times.
Rack System Selection: Matching Storage to Operations
Selective Pallet Rack for Maximum Flexibility
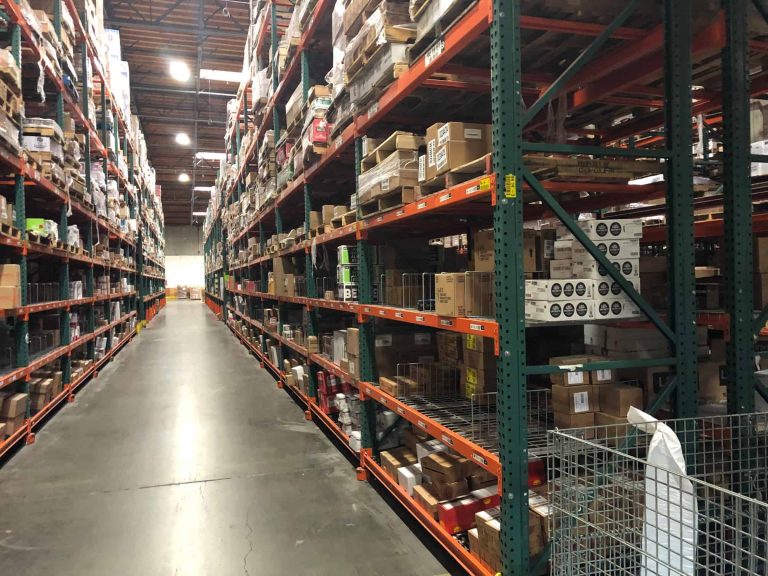
Selective pallet racking provides direct access to every pallet position, making it ideal for operations with varied SKUs and frequent picking requirements. This system offers maximum flexibility for mixed inventory but uses space less efficiently than high-density alternatives.
The accessibility comes at a space cost. Selective racking requires aisles between every rack section, reducing overall storage density compared to drive-in or flow systems. However, the operational flexibility often justifies the space trade-off for mixed SKU operations.
Load capacity and beam spacing can be customized for specific product requirements. This flexibility accommodates diverse inventory without requiring multiple rack types throughout the facility.
Drive-In Systems for Bulk Storage
Drive-in and drive-through racking maximizes storage density by eliminating aisles between storage bays. Forklifts drive directly into the rack structure, storing multiple pallets deep in each lane.
This system works best for bulk storage operations with limited SKU variety and consistent product dimensions. The high density comes with reduced selectivity since pallets must be retrieved in LIFO order for drive-in configurations.
Drive-through systems enable FIFO retrieval by allowing access from both sides of the rack. This configuration requires more space but provides better inventory rotation for time-sensitive products.
Push-Back Racks for Balanced Density
Push-back racking provides higher density than selective systems while maintaining better selectivity than drive-in configurations. Pallets store on inclined rails that allow multiple pallets per lane with LIFO retrieval.
The system automatically brings the next pallet forward when the front pallet is removed. This self-feeding mechanism reduces handling time while maintaining good storage density for operations with moderate SKU variety.
Typical configurations handle 2-6 pallets deep, balancing storage density with accessibility requirements. Deeper configurations increase density but reduce selectivity and complicate inventory management.
Pallet Flow Racks for High-Volume Operations
Gravity-driven pallet flow systems excel in high-volume operations requiring FIFO inventory rotation. Pallets load from one end and flow to picking positions at the other end, reducing handling while ensuring proper rotation.
These systems work particularly well for time-sensitive products, high-velocity items, and operations requiring automatic inventory rotation. The FIFO flow prevents product aging and maintains quality for perishable goods.
Installation costs are higher than standard racking, but labor savings and improved inventory rotation often justify the investment for appropriate applications.
Critical Dimension Planning
Maximizing Vertical Space
Calculate rack heights to use maximum ceiling space while maintaining required clearances. Most facilities need 18-36 inches above the top load level for sprinkler effectiveness, but local codes may require more.
Beam level spacing depends on pallet height plus necessary clearance. Most operations need 3-6 inches of clearance above pallets to prevent damage during storage and retrieval. Taller products require proportionally more clearance.
Load capacity calculations must account for maximum anticipated weights including pallet, product, and any packaging. Oversizing capacity provides safety margins but increases costs, while undersizing creates safety hazards and operational limitations.
Aisle Width Optimization
Aisle dimensions directly impact both storage density and operational efficiency. Wider aisles improve safety and maneuverability but reduce storage capacity. Narrower aisles maximize space but may slow operations and increase accident risk.
Counterbalance forklifts typically require 12-13 feet for safe operation with standard pallets. Reach trucks can operate in 8-10 foot aisles, while very narrow aisle equipment needs only 6-7 feet but requires specialized guidance systems.
Consider peak period operations when determining aisle widths. Aisles that work fine during normal operations may become congested during busy periods, creating bottlenecks that affect overall productivity.
Equipment Integration Planning
Material handling equipment capabilities determine minimum aisle requirements and maximum lift heights. Document all equipment specifications including turning radius, lift capacity, and mast dimensions before finalizing layouts.
Different equipment types may require different aisle widths within the same facility. Design main aisles for the largest equipment while using narrower aisles in zones served by smaller units.
Future equipment considerations matter for long-term planning. Facilities planning automation or equipment upgrades should design aisles and clearances to accommodate anticipated changes.
Workflow and Flow Pattern Design
Main Aisle Strategy
Design main aisles to handle primary traffic flow from receiving to shipping areas. These thoroughfares should be wider than storage aisles to accommodate two-way traffic and reduce congestion during peak periods.
Position main aisles to create logical flow patterns that minimize backtracking and cross-traffic. The most efficient layouts create clear paths that follow natural workflow progression from inbound to outbound operations.
Cross aisles provide access to storage zones while maintaining efficient main traffic flow. Position these connectors to balance accessibility with storage density, avoiding excessive aisle space that reduces capacity.
High-Velocity Product Positioning
Place fast-moving items in golden zone locations near shipping areas and main aisles. This positioning reduces travel time for the products that move most frequently, creating the biggest impact on overall productivity.
Group related fast-moving items together when possible to enable batch picking and reduce travel between pick locations. This clustering strategy works particularly well for orders containing multiple related products.
Consider seasonal patterns when positioning products. Items with predictable seasonal spikes should have flexible storage assignments that can expand during peak periods without disrupting overall flow patterns.
Working Around Structural Elements
Column Integration Strategies
Position building columns within rack rows when possible to maximize usable floor space. This placement requires careful planning to ensure rack connections don’t interfere with structural elements.
Back-to-back rack configurations can hide columns between storage sections while maintaining required flue spaces for fire protection. This strategy maximizes storage density while meeting safety requirements.
When columns must remain in aisles, install protective barriers and consider wider aisles to maintain safe equipment operation. Mark column locations clearly and train operators on safe navigation procedures.
Fire Code Compliance
Maintain required flue spaces between rack backs, typically 6 inches minimum for fire suppression access. These clearances ensure sprinkler effectiveness and provide access for emergency personnel.
Sprinkler head spacing and coverage patterns affect rack height and spacing decisions. Work with fire protection engineers early in the design process to optimize layouts while maintaining code compliance.
Emergency access routes must remain clear and accessible at all times. Design layouts that provide multiple egress paths and avoid creating dead-end areas where personnel could become trapped.
Safety and Compliance Integration
Load Management Systems
Install clear load capacity signage at every rack section to prevent overloading that could cause structural failure. Include maximum load per beam, maximum load per level, and maximum total rack load information.
Document load distribution requirements and train personnel on proper loading procedures. Uneven loading can create dangerous stress concentrations that exceed design limits even when total weight remains within capacity.
Implement load monitoring procedures to verify compliance with capacity limits. Regular inspections can catch overloading before it creates safety hazards or structural damage.
Protection Systems
Install column guards at rack intersections and high-traffic areas to prevent damage from equipment impacts. These protective barriers absorb impacts that could otherwise damage structural elements.
End-of-aisle protection prevents equipment from accidentally entering rack bays at excessive speeds. These barriers protect both equipment and rack structures while maintaining clear sight lines for operators.
Proper rack anchoring prevents tip-over in seismic events and provides stability during normal operations. Follow manufacturer specifications and local building codes for anchor selection and installation.
Lighting and Visibility
Adequate lighting throughout storage areas ensures safe equipment operation and accurate order picking. Design lighting layouts to minimize shadows and provide uniform illumination at all storage levels.
Aisle marking and signage help operators navigate efficiently while maintaining safety awareness. Clear location identification also supports inventory accuracy and reduces picking errors.
Consider emergency lighting requirements for power outage situations. Battery backup systems should provide adequate illumination for safe evacuation and emergency response activities.
Technology Integration and Future Planning
Warehouse Management System Integration
Modern WMS platforms optimize slotting decisions based on product velocity, pick frequency, and order patterns. Design rack layouts that support automated slotting while maintaining operational flexibility.
Real-time inventory tracking requires integration between rack locations and system databases. Plan location numbering schemes that support both manual operations and automated tracking systems.
Pick path optimization algorithms work best with logical rack numbering and consistent aisle patterns. Design layouts that enable efficient system-generated pick routes without forcing unnatural travel patterns.
Automation Readiness
Consider future automation possibilities when designing aisle widths and rack spacing. Automated guided vehicles, robotic picking systems, and conveyor integration require specific clearances and access patterns.
Very narrow aisle systems may support current operations but could limit future automation options. Balance immediate space needs with long-term technology integration possibilities.
Infrastructure planning for automation includes electrical supply, communication networks, and control system integration. Design these capabilities into initial layouts rather than retrofitting later.
Modular Design for Flexibility
Plan rack configurations that allow expansion or reconfiguration as business needs change. Modular systems support growth without requiring complete layout redesigns.
Standardize rack components when possible to simplify future modifications and reduce spare parts inventory. Common beam lengths and upright heights provide maximum flexibility for layout changes.
Document design decisions and maintain accurate drawings for future reference. This documentation supports efficient modifications and helps prevent costly mistakes during expansion projects.
Implementation Best Practices
Phased Installation Strategy
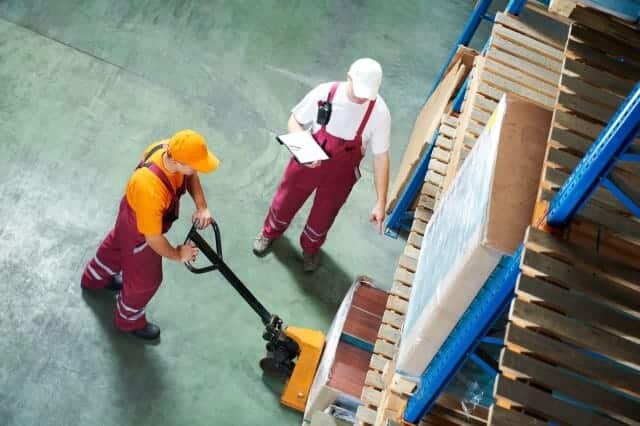
Install racks in phases to maintain ongoing operations during implementation. Plan phases that allow continued access to existing inventory while adding new storage capacity.
Create temporary staging areas for inventory relocation during installation. These areas should have adequate capacity and easy access for efficient product movement.
Test new rack sections thoroughly before loading with inventory. Verify all connections, check level and plumb conditions, and confirm load capacity calculations.
Staff Training and Safety
Train all personnel on load capacity limits, proper loading procedures, and safety protocols before beginning operations. Include both equipment operators and supervisors in comprehensive training programs.
Establish clear procedures for loading and unloading operations that prevent overloading and ensure even weight distribution. Regular refresher training helps maintain safe practices over time.
Create inspection and maintenance programs that identify potential problems before they become safety hazards. Regular rack inspections should include visual checks for damage, overloading, and proper connections.
Continuous Optimization
Monitor operations after installation to identify optimization opportunities. Traffic patterns, picking efficiency, and safety incidents provide insights for layout improvements.
Collect feedback from operators and supervisors on operational challenges and inefficiencies. Front-line personnel often identify problems that aren’t visible in planning stages.
Plan regular layout reviews to adapt to changing business needs. Product mix changes, seasonal patterns, and growth all affect optimal storage configurations over time.
Frequently Asked Questions
How much storage capacity increase can I expect from a new pallet rack layout? Most facilities see 25-40% storage capacity increases through optimized layouts that better utilize vertical space and reduce wasted floor area. The exact improvement depends on current layout efficiency and ceiling height utilization.
What’s the minimum aisle width I can use while maintaining safety? Aisle width depends on equipment type and load dimensions. Counterbalance forklifts need 12-13 feet, reach trucks require 8-10 feet, and VNA equipment can operate in 6-7 feet with proper guidance systems.
How do I determine the right rack height for my facility? Calculate maximum rack height by subtracting required sprinkler clearance (typically 18-36 inches) from ceiling height. Consider equipment lift capacity and operator visibility when determining practical working heights.
Can I mix different rack types in the same warehouse? Yes, many facilities benefit from using different rack types for different products. Fast-moving items might use selective racks for accessibility while bulk products use drive-in systems for density.
How much clearance do I need between pallets and rack beams? Most operations need 3-6 inches of clearance above pallets to prevent damage during placement and removal. Taller or more fragile products may require additional clearance for safe handling.
What load capacity should I specify for my racks? Calculate load capacity based on maximum anticipated weights including pallet, product, and packaging. Add safety margins but avoid significant oversizing that increases costs unnecessarily.
How do I plan for future growth in my layout design? Design modular rack configurations using standard components that allow expansion. Leave space for additional racks and plan aisle layouts that can accommodate future automation or equipment changes.
What fire code requirements affect rack layout design? Key requirements include flue spaces between rack backs (typically 6 inches), sprinkler clearances above top loads, and emergency egress path maintenance. Consult local fire officials early in planning.
Should I hire a professional designer for my rack layout? Complex layouts, high-density systems, or facilities with significant operational challenges benefit from professional design. Simple layouts for standard operations can often be planned in-house with manufacturer support.
How long does rack installation typically take? Installation time depends on system complexity and facility size. Simple selective rack systems might install in days, while complex high-density systems can take weeks. Plan for 2-4 weeks for most medium-sized projects.
Key Takeaways
- Measure accurately and plan for constraints: Precise facility measurements and code compliance requirements drive all layout decisions and prevent costly redesigns
- Match rack systems to operational needs: Selective racks provide flexibility, drive-in systems maximize density, and flow racks optimize high-velocity operations
- Optimize aisle widths for equipment and safety: Balance storage density with operational efficiency by matching aisle dimensions to equipment requirements
- Position inventory by velocity patterns: Place fast-moving products near shipping areas and group related items to minimize travel time and improve productivity
- Plan for flexibility and future growth: Use modular designs and standard components that support expansion and reconfiguration as business needs evolve
- Integrate safety from the start: Proper load management, protection systems, and code compliance prevent accidents and ensure long-term operational success
- Consider technology integration early: Plan for WMS optimization and future automation possibilities to avoid limitations as technology needs evolve

Ted Hodges - CEO & Founder
Ted Hodges is the Founder and CEO of Conesco Storage Systems, a company he started in 1986 to provide turnkey warehousing products and services, including the repurposing of quality, used material handling equipment. With over 40 employees across the country, Ted and his team serve customers of all sizes throughout the different stages of the warehousing lifecycle.